Contents
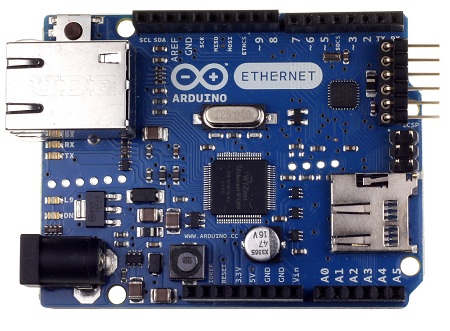
Arduino Ethernet

Setup
See Setting up the Arduino Ethernet by Sven Hofmann for details.
Connets to the USB port using an FTDI cable (TTL-232R-3V3).
On OSX/Linux/Windows a driver is needed from FTDI driver download. The drivers are also available from Sven's website via Dropbox, but these may be out of date.
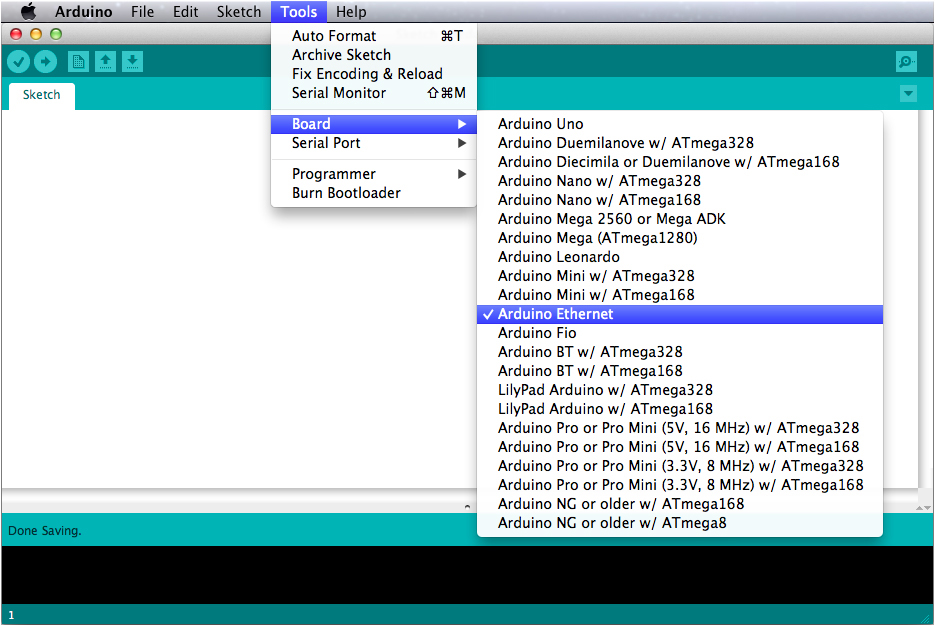
- Choose the Arduino Ethernet board from the drow-down menu:

LED Blink test
The first and most basic test is to run the Blink example program found under File → Examples → 01.Basics → Blink in the Arduino IDE.
Loading and running the Blink sketch will test that you can upload sketches to the Arduino Ethernet board and test the LED.
Before running the Blink sketch, you will need to modify it because the LED is found on pin 9 of the Arduino Ethernet board and not on pin 13 like the Arduino Uno.
You can modify the sketch from the IDE or copy the modified Blink sketch below and paste it into the Arduino IDE.
/*
  Blink
  Turns on an LED on for one second, then off for one second, repeatedly.

  This example code is in the public domain.
 */

// Pin 9 on the Arduino Ethernet has an LED connected.
// give it a name:
int led = 9;

// the setup routine runs once when you press reset:
void setup() {
  // initialize the digital pin as an output.
  pinMode(led, OUTPUT);
}

// the loop routine runs over and over again forever:
void loop() {
  digitalWrite(led, HIGH);   // turn the LED on (HIGH is the voltage level)
  delay(1000);               // wait for a second
  digitalWrite(led, LOW);    // turn the LED off by making the voltage LOW
  delay(1000);               // wait for a second
}
Ethernet Setup
Important
See Ethernet Setup for the Arduino Ethernet Shield for details and movies of the setup procedure.
Ethernet Cable Connection
The other end of the Ethernet cable is plugged into a router (e.g. a spare Ethernet port on a ADSL router that the PC that will be used to connect to the Ethernet shield is also plugged into).
Ethernet Cable Type
The Ethernet cable used to connect the Ethernet shield to the router is the straight through type, i.e. the two connectors are wired one-to-one (no wires in the cable are crossed over).
Testing the Arduino Ethernet Shield
The video below shows how to load the built in WebServer example sketch to test the Ethernet shield. The WebServer sketch configures the Arduino / Ethernet shield as a tiny web server that serves up a web page containing the values of the Arduino analog pins.
First the IP address of the PC is found. The WebServer sketch is then modified to use a different IP address, but in the same range as the PC.
After loading the sketch to the Arduino, the IP address used in the sketch is entered into the URL field of the web browser. The web browser then connects to the Arduino web server, and the values of the Arduino analog pins are displayed. These values are updated every 5 seconds.
Determining the IP Address Range
The address range that the PC is using must be determined. The Arduino will then be assigned an address within this range which will allow a web browser on the PC to connect to the Arduino web server.
Windows 7
In Windows 7, click the Internet Access icon on the bottom Windows bar. You may first need to click the small 'up arrow' for the network icon to be displayed (as shown in the video).
After clicking the Internet Access icon, click Open Network and Sharing Center in the box that pops up.
Now click Local Area Connection and then Details... in the dialog box that pops up.
In the Network Connection Details dialog box that pops up, the IP address of the PC can be found next to IPv4 Address.
Linux OSX
To find the IP address of a Linux computer, enter the following at the command line:
ifconfig | grep "inet addr"
Connecting to the Arduino Web Server
In the video, the IP address of the PC is found to be 10.0.0.6 – this means that we must choose an IP address for the Arduino that has the value of 10.0.0.x, where x is a number that is not used on the network, e.g. 10.0.0.12 was used in the video.
In the Arduino IDE, open the WebServer example program found under File → Examples → Ethernet → WebServer
Now change the IP address in the sketch found at this line of code:
IPAddress ip(192,168,1, 177);
For example, change it to:
IPAddress ip(10,0,0, 12);
The MAC address should also be changed in the sketch to the numbers found on the sticker on the bottom side of the Ethernet shield. This can be changed in this line of code:
byte mac[] = {
  0xDE, 0xAD, 0xBE, 0xEF, 0xFE, 0xED };
Now load the sketch to the Arduino. On Windows computers, it may be necessary to push the reset button on the Ethernet shield after loading the sketch.
Open up a web browser on the PC and type the IP address into the URL field that you entered into the WebServer sketch (10.0.0.12 in the video, if you have problems, then try the format http://10.0.0.12 using the IP address that you chose).
The web browser should now connect to the Arduino web server and you should see the values of the analog pins displayed in the browser.
Python
PySerial: from PySerial installed on Maigret using sudo pip-2.7 install pyserial
Example of using Python code to control an Arduino is from Open Home Automation : 101 Controlling an actuator.
